今回はWP7605でBluetoothデバイスを扱うための環境整備を行います.
WP7605にはBluetoothの機能はないため別途ドングルを使用する必要はありますが
活用の幅を広げることができるので有用です.
WP7605でBluetoothドングルを使ってみる
既にカーネルにBluetooth機能が含まれているためテスト等は簡単にできます.
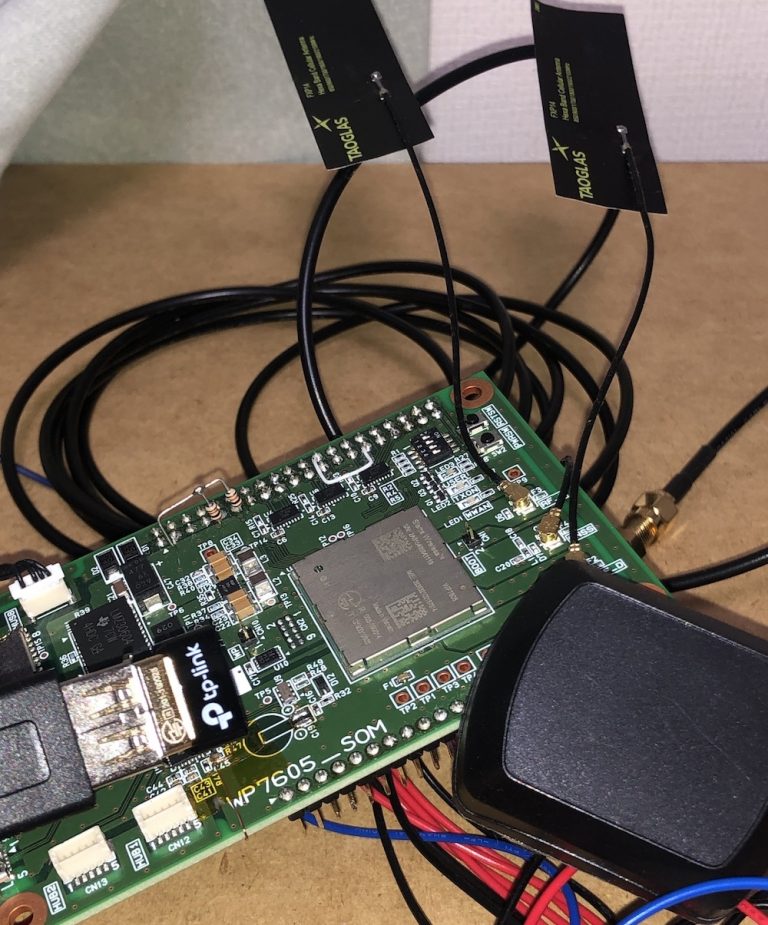
USB OTGケーブルを介してBluetoothドングルを接続します.
使用したドングルはTP-Link社のUB4Aです.
今回は別途電源供給を行うセルフパワーUSBハブを介して接続しました.
接続を確認します.
# hciconfig
hci0:	Type: Primary  Bus: USB
	BD Address: 00:1A:7D:DA:71:15  ACL MTU: 310:10  SCO MTU: 64:8
	DOWN
	RX bytes:570 acl:0 sco:0 events:30 errors:0
	TX bytes:358 acl:0 sco:0 commands:29 errors:0
#
接続されていますがDOWNとなっているので有効化します.
# hciconfig hci0 up
# hciconfig
hci0:	Type: Primary  Bus: USB
	BD Address: 00:1A:7D:DA:71:15  ACL MTU: 310:10  SCO MTU: 64:8
	UP RUNNING
	RX bytes:1134 acl:0 sco:0 events:59 errors:0
	TX bytes:716 acl:0 sco:0 commands:58 errors:0
#
有効化されました.
この状況でhcitoolを用いてテストができます.
(一応伏せ字にしてあります.)
# hcitool scan
Scanning ...
	xx:xx:xx:xx:xx:xx	DEVICENAME
# hcitool lescan
LE Scan ...
xx:xx:A4:xx:xx:50 (unknown)
xx:xx:A4:xx:xx:50 (unknown)
xx:xx:F4:xx:xx:EB (unknown)
xx:xx:F4:xx:xx:EB (unknown)
xx:xx:5C:xx:xx:C6 (unknown)
xx:xx:5C:xx:xx:C6 (unknown)
^C
#
既にインストールされているツールは使用できることが確認できました.
自分でBluetoothに関するソフトウェアを開発するにはコンパイル環境にライブラリが必要です.
BluetoothのライブラリBlueZを導入する
ビルドマシン側で必要なソフトウェアを導入しておきます.
$ sudo apt install -y python-docutilsライブラリを導入するにあたり準備を行います.
$ mkdir ~/workspace/wp7605_libbt
$ cd ~/workspace/wp7605_libbt
$ . /opt/swi/SWI9X07Y_02.28.03.05/environment-setup-armv7a-neon-poky-linux-gnueabi
必要なライブラリは以下のとおりです.
BlueZを導入するには他に2個のライブラリが必要です.
- BlueZ
- dbus
- libical
dbus
$ mkdir ~/workspace/wp7605_libbt/dbus
$ cd ~/workspace/wp7605_libbt/dbus
$ wget https://dbus.freedesktop.org/releases/dbus/dbus-1.6.30.tar.gz
$ tar xvzf dbus-1.6.30.tar.gz
$ cd dbus-1.6.30/
$ ./configure $CONFIGURE_FLAGS --with-sysroot=$SDKTARGETSYSROOT --prefix=$SDKTARGETSYSROOT/usr
$ make
$ sudo su
# . /opt/swi/SWI9X07Y_02.28.03.05/environment-setup-armv7a-neon-poky-linux-gnueabi
# make install
# ln -s /opt/swi/SWI9X07Y_02.28.03.05/sysroots/armv7a-neon-poky-linux-gnueabi/usr/include/dbus-1.0/dbus /opt/swi/SWI9X07Y_02.28.03.05/sysroots/armv7a-neon-poky-linux-gnueabi/usr/include/dbus
# ln -s /opt/swi/SWI9X07Y_02.28.03.05/sysroots/armv7a-neon-poky-linux-gnueabi/usr/lib/dbus-1.0/include/dbus/dbus-arch-deps.h /opt/swi/SWI9X07Y_02.28.03.05/sysroots/armv7a-neon-poky-linux-gnueabi/usr/include/dbus-1.0/dbus
# exit
$
libical
$ mkdir ~/workspace/wp7605_libbt/libical
$ cd ~/workspace/wp7605_libbt/libical
$ wget http://downloads.sourceforge.net/freeassociation/libical-1.0.tar.gz
$ tar -xzf libical-1.0.tar.gz
$ cd libical-1.0/
$ cmake  -DCMAKE_INSTALL_PREFIX=$SDKTARGETSYSROOT/usr -DCMAKE_C_FLAGS="$CONFIGURE_FLAGS -DSIERRA -O2 -pipe -g -feliminate-unused-debug-types" -DCMAKE_CXX_FLAGS="$CONFIGURE_FLAGS -DSIERRA -O2 -pipe -g -feliminate-unused-debug-types"
$ make
$ sudo su
# . /opt/swi/SWI9X07Y_02.28.03.05/environment-setup-armv7a-neon-poky-linux-gnueabi
# make install
# exit
$
BlueZ
$ mkdir ~/workspace/wp7605_libbt/bluez
$ cd ~/workspace/wp7605_libbt/bluez
$ wget http://www.kernel.org/pub/linux/bluetooth/bluez-4.101.tar.xz
$ tar xvzf bluez-4.101.tar.xz
$ cd bluez-4.101/
$ autoreconf --install
$ ./configure $CONFIGURE_FLAGS --with-sysroot=$SDKTARGETSYSROOT --prefix=$SDKTARGETSYSROOT/usr --host=arm-linux
$ make
$ sudo su
# . /opt/swi/SWI9X07Y_02.28.03.05/environment-setup-armv7a-neon-poky-linux-gnueabi
# make install
# exit
$
以上でライブラリの導入が完了です.
ソフトウェアの開発
周辺のBLEデバイスのアドバタイズパケットよりアドレスを取得して
ロギングするソフトウェアを開発しました.
今回プログラムを2つに分割して作成しました.
一つは周辺のBLEデバイスのアドレスを収集し出力するプログラム,
https://github.com/e-trees/wp7605prj/tree/master/bleaddrdump
もう一つは出力されたアドレスやその時点の時刻,位置情報をまとめて保存し
一定時間ごとに出力,保存,転送するプログラム.
https://github.com/e-trees/wp7605prj/tree/master/blelogger
BLEデバイスのアドレスを収集する
収集するプログラムはhcitoolをほとんど踏襲することで実現しました.
https://github.com/pauloborges/bluez/blob/master/tools/hcitool.c
このソースコードでは電波の強さであるRSSIが取得できなかったため
BLEの仕様書よりパケットの構造を確認して出力できるように工夫しました.
収集したアドレスを出力,保存,転送する
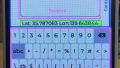
WP7605からGPSで位置情報を取得できるのでATコマンド経由で取得しました.
またキャリア回線経由で通信が可能なのでhttpのPOSTリクエストでクラウド等へ
転送できるようになっています.
C言語で通信するのは大変なのでlibcurlを用いて省力化しました.
使ってみる
プログラムをクローンするなりプルするなりしてクロスコンパイルします.
$ cd ~/workspace/wp7605prj
$ git pull
$ . /opt/swi/SWI9X07Y_02.28.03.05/environment-setup-armv7a-neon-poky-linux-gnueabi
$ cd bleaddrdump
$ make
$ scp blescan root@192.168.2.2:~/
$ cd ../blelogger
$ make
$ scp logger root@192.168.2.2:~/
キャリア回線を使用する場合は事前に接続処理をしておきます.
# cm data connect &以下のように実行するとBLEデバイスのアドレス一覧が出力されログファイルに保存されています.
またサーバにはデータが転送されています.
(一部処理結果は改変しています.)
# ./logger -t 10 -u http://example.com:3000/ -f log.txt -p
interval[10] URL
 example.com logfile[log.txt]
xx:xx:68:xx:xx:F5,-64,1650421140,35.675932,139.745031
xx:xx:B9:xx:xx:84,-47,1650421139,35.675932,139.745031
xx:xx:71:xx:xx:30,-68,1650421140,35.675932,139.745031
xx:xx:47:xx:xx:BB,-89,1650421141,35.675932,139.745031
xx:xx:9B:xx:xx:5A,-47,1650421140,35.675932,139.745031
xx:xx:F4:xx:xx:EB,-33,1650421140,35.675932,139.745031
xx:xx:5A:xx:xx:24,-83,1650421140,35.675932,139.745031
xx:xx:F4:xx:xx:7B,-35,1650421140,35.675932,139.745031
Dump Item 8
xx:xx:68:xx:xx:F5,-68,1650421149,35.675932,139.745031
xx:xx:B9:xx:xx:84,-45,1650421149,35.675932,139.745031
xx:xx:71:xx:xx:30,-58,1650421149,35.675932,139.745031
xx:xx:47:xx:xx:BB,-88,1650421150,35.675932,139.745031
xx:xx:9B:xx:xx:5A,-51,1650421149,35.675932,139.745031
xx:xx:F4:xx:xx:EB,-35,1650421149,35.675932,139.745031
xx:xx:5A:xx:xx:24,-83,1650421150,35.675932,139.745031
xx:xx:F4:xx:xx:7B,-35,1650421150,35.675932,139.745031
Dump Item 8
xx:xx:68:xx:xx:F5,-67,1650421159,35.675932,139.745031
xx:xx:B9:xx:xx:84,-41,1650421159,35.675932,139.745031
xx:xx:71:xx:xx:30,-51,1650421159,35.675932,139.745031
xx:xx:55:xx:xx:37,-91,1650421159,35.675932,139.745031
xx:xx:47:xx:xx:BB,-91,1650421159,35.675932,139.745031
xx:xx:9B:xx:xx:5A,-47,1650421159,35.675932,139.745031
xx:xx:F4:xx:xx:EB,-33,1650421159,35.675932,139.745031
xx:xx:5A:xx:xx:24,-91,1650421160,35.675932,139.745031
xx:xx:F4:xx:xx:7B,-36,1650421160,35.675932,139.745031
Dump Item 9
^C
# cat log.txt
xx:xx:68:xx:xx:F5,-64,1650421140,35.675932,139.745031
xx:xx:B9:xx:xx:84,-47,1650421139,35.675932,139.745031
xx:xx:71:xx:xx:30,-68,1650421140,35.675932,139.745031
xx:xx:47:xx:xx:BB,-89,1650421141,35.675932,139.745031
xx:xx:9B:xx:xx:5A,-47,1650421140,35.675932,139.745031
xx:xx:F4:xx:xx:EB,-33,1650421140,35.675932,139.745031
xx:xx:5A:xx:xx:24,-83,1650421140,35.675932,139.745031
xx:xx:F4:xx:xx:7B,-35,1650421140,35.675932,139.745031
xx:xx:68:xx:xx:F5,-68,1650421149,35.675932,139.745031
xx:xx:B9:xx:xx:84,-45,1650421149,35.675932,139.745031
xx:xx:71:xx:xx:30,-58,1650421149,35.675932,139.745031
xx:xx:47:xx:xx:BB,-88,1650421150,35.675932,139.745031
xx:xx:9B:xx:xx:5A,-51,1650421149,35.675932,139.745031
xx:xx:F4:xx:xx:EB,-35,1650421149,35.675932,139.745031
xx:xx:5A:xx:xx:24,-83,1650421150,35.675932,139.745031
xx:xx:F4:xx:xx:7B,-35,1650421150,35.675932,139.745031
xx:xx:68:xx:xx:F5,-67,1650421159,35.675932,139.745031
xx:xx:B9:xx:xx:84,-41,1650421159,35.675932,139.745031
xx:xx:71:xx:xx:30,-51,1650421159,35.675932,139.745031
xx:xx:55:xx:xx:37,-91,1650421159,35.675932,139.745031
xx:xx:47:xx:xx:BB,-91,1650421159,35.675932,139.745031
xx:xx:9B:xx:xx:5A,-47,1650421159,35.675932,139.745031
xx:xx:F4:xx:xx:EB,-33,1650421159,35.675932,139.745031
xx:xx:5A:xx:xx:24,-91,1650421160,35.675932,139.745031
xx:xx:F4:xx:xx:7B,-36,1650421160,35.675932,139.745031
#
example.com logfile[log.txt]
xx:xx:68:xx:xx:F5,-64,1650421140,35.675932,139.745031
xx:xx:B9:xx:xx:84,-47,1650421139,35.675932,139.745031
xx:xx:71:xx:xx:30,-68,1650421140,35.675932,139.745031
xx:xx:47:xx:xx:BB,-89,1650421141,35.675932,139.745031
xx:xx:9B:xx:xx:5A,-47,1650421140,35.675932,139.745031
xx:xx:F4:xx:xx:EB,-33,1650421140,35.675932,139.745031
xx:xx:5A:xx:xx:24,-83,1650421140,35.675932,139.745031
xx:xx:F4:xx:xx:7B,-35,1650421140,35.675932,139.745031
Dump Item 8
xx:xx:68:xx:xx:F5,-68,1650421149,35.675932,139.745031
xx:xx:B9:xx:xx:84,-45,1650421149,35.675932,139.745031
xx:xx:71:xx:xx:30,-58,1650421149,35.675932,139.745031
xx:xx:47:xx:xx:BB,-88,1650421150,35.675932,139.745031
xx:xx:9B:xx:xx:5A,-51,1650421149,35.675932,139.745031
xx:xx:F4:xx:xx:EB,-35,1650421149,35.675932,139.745031
xx:xx:5A:xx:xx:24,-83,1650421150,35.675932,139.745031
xx:xx:F4:xx:xx:7B,-35,1650421150,35.675932,139.745031
Dump Item 8
xx:xx:68:xx:xx:F5,-67,1650421159,35.675932,139.745031
xx:xx:B9:xx:xx:84,-41,1650421159,35.675932,139.745031
xx:xx:71:xx:xx:30,-51,1650421159,35.675932,139.745031
xx:xx:55:xx:xx:37,-91,1650421159,35.675932,139.745031
xx:xx:47:xx:xx:BB,-91,1650421159,35.675932,139.745031
xx:xx:9B:xx:xx:5A,-47,1650421159,35.675932,139.745031
xx:xx:F4:xx:xx:EB,-33,1650421159,35.675932,139.745031
xx:xx:5A:xx:xx:24,-91,1650421160,35.675932,139.745031
xx:xx:F4:xx:xx:7B,-36,1650421160,35.675932,139.745031
Dump Item 9
^C
# cat log.txt
xx:xx:68:xx:xx:F5,-64,1650421140,35.675932,139.745031
xx:xx:B9:xx:xx:84,-47,1650421139,35.675932,139.745031
xx:xx:71:xx:xx:30,-68,1650421140,35.675932,139.745031
xx:xx:47:xx:xx:BB,-89,1650421141,35.675932,139.745031
xx:xx:9B:xx:xx:5A,-47,1650421140,35.675932,139.745031
xx:xx:F4:xx:xx:EB,-33,1650421140,35.675932,139.745031
xx:xx:5A:xx:xx:24,-83,1650421140,35.675932,139.745031
xx:xx:F4:xx:xx:7B,-35,1650421140,35.675932,139.745031
xx:xx:68:xx:xx:F5,-68,1650421149,35.675932,139.745031
xx:xx:B9:xx:xx:84,-45,1650421149,35.675932,139.745031
xx:xx:71:xx:xx:30,-58,1650421149,35.675932,139.745031
xx:xx:47:xx:xx:BB,-88,1650421150,35.675932,139.745031
xx:xx:9B:xx:xx:5A,-51,1650421149,35.675932,139.745031
xx:xx:F4:xx:xx:EB,-35,1650421149,35.675932,139.745031
xx:xx:5A:xx:xx:24,-83,1650421150,35.675932,139.745031
xx:xx:F4:xx:xx:7B,-35,1650421150,35.675932,139.745031
xx:xx:68:xx:xx:F5,-67,1650421159,35.675932,139.745031
xx:xx:B9:xx:xx:84,-41,1650421159,35.675932,139.745031
xx:xx:71:xx:xx:30,-51,1650421159,35.675932,139.745031
xx:xx:55:xx:xx:37,-91,1650421159,35.675932,139.745031
xx:xx:47:xx:xx:BB,-91,1650421159,35.675932,139.745031
xx:xx:9B:xx:xx:5A,-47,1650421159,35.675932,139.745031
xx:xx:F4:xx:xx:EB,-33,1650421159,35.675932,139.745031
xx:xx:5A:xx:xx:24,-91,1650421160,35.675932,139.745031
xx:xx:F4:xx:xx:7B,-36,1650421160,35.675932,139.745031
#サーバでは先程のデータが送信されていることが確認できました.
$ node app.js
Listen port: 3000
...
/
{"time":1650421169,"data":[{"addr":"xx:xx:68:xx:xx:F5","rssi":-67,"time":1650421159,"lat":35.675932,"lon":139.745031},...,{"addr":"xx:xx:5A:xx:xx:24","rssi":-91,"time":1650421160,"lat":35.675932,"lon":139.745031},{"addr":"xx:xx:F4:xx:xx:7B","rssi":-36,"time":1650421160,"lat":35.675932,"lon":139.745031}]}
{
  time: 1650421169,
  data: [
    {
      addr: 'xx:xx:68:xx:xx:F5',
      rssi: -67,
      time: 1650421159,
      lat: 35.675932,
      lon: 139.745031
    },
...
    {
      addr: 'xx:xx:5A:xx:xx:24',
      rssi: -91,
      time: 1650421160,
      lat: 35.675932,
      lon: 139.745031
    },
    {
      addr: 'xx:xx:F4:xx:xx:7B',
      rssi: -36,
      time: 1650421160,
      lat: 35.675932,
      lon: 139.745031
    }
  ]
}
送信されたPOSTリクエストを単純に表示するだけのテストプログラムです.
"use strict";
const http = require("http");
const url = require("url");
const port = 3000;

const server = http.createServer((request, response) => {
	let buffer = '';
	request.on('data', chunk =>{
		buffer += chunk;
	})
	request.on('end', ()=>{
		if(buffer){
			console.log(buffer.toString("utf-8"));
			console.log(JSON.parse(buffer));
		}
	})
	console.log(request.url);
    response.writeHead(200, {
      "Content-Type": "text/html"
    });

    const responseMessage = "OK";
    response.end(responseMessage);
});

server.listen(port);
console.log(`Listen port: ${port}`);
まとめ
Bluetooth関連のソフトウェアを開発するためにライブラリの導入を行いました.
またそのライブラリを使用して実用的なソフトウェアを作成しました.
Bluetoothの規格をイチから読んで理解は難しいため
既存のプログラムを参考にしつつ予定した機能の実現ができました.
Bluetooth+WP7605で更に活用の幅広がります.
コメント